
Timbering tools and equipment form the essential kit that every building technician must master before undertaking excavation support works. This guide explains the tools and equipment required for timbering operations, their uses, and the correct methods of handling them on site.
Introduction to Timbering Tools and Equipment
Timbering operations demand a specific set of tools and equipment. Without them, a building technician cannot cut, assemble, or install timber members correctly. Moreover, using the wrong tool leads to poor workmanship, wasted materials, and serious safety risks.
Therefore, every building technician should understand not only which tools to use but also how to use them. In addition, tools must be assembled, maintained, and stored according to manufacturer instructions. This guide covers the full range of timbering tools and equipment, from measuring instruments to lifting devices.
Why Timbering Tools and Equipment Matter
Timbering works involve cutting timber to size, checking squareness, verifying plumbness, and assembling members under load. Consequently, precision matters. A trench that is not excavated to the correct width or depth will not accept the timbering system properly.
Furthermore, the TVET CDACC assessment for Perform Building Temporary Works awards marks specifically for the correct assembly and use of tools. For example, candidates earn marks for correctly using a tape measure, handsaw, square, and plumb bob. Therefore, tool competence is not optional ,it is a graded requirement.
Categories of Timbering Tools and Equipment
Timbering tools fall into several broad categories. Understanding these categories helps the technician select the right tool for each task. The main categories are described below.
Measuring and Marking Tools
Measuring tools establish dimensions before any cutting begins. Without accurate measurement, the entire timbering system will fail to fit.
- Tape measure – used to measure trench length, width, and depth, as well as timber member sizes. A steel tape of 5 m or 8 m is standard on site.
- Folding rule – useful for short measurements and for checking timber thickness.
- Try square – used to mark and check right angles on timber members.
- Marking gauge – scribes lines parallel to an edge for accurate cutting.
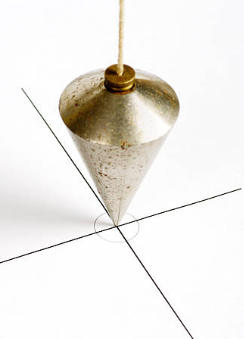
- Plumb bob – establishes a true vertical line. It is essential for checking the plumbness of poling boards and struts.
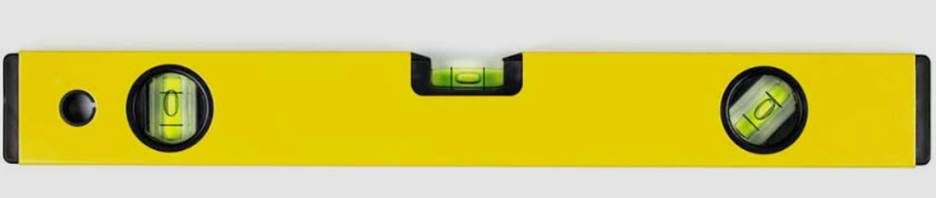
- Spirit level – verifies that walings and struts are horizontal or vertical as required.
- Line and pins – mark the trench outline on the ground before excavation begins.
Cutting Tools
Cutting tools shape timber to the required dimensions. Furthermore, they must be kept sharp to ensure clean cuts and safe operation.
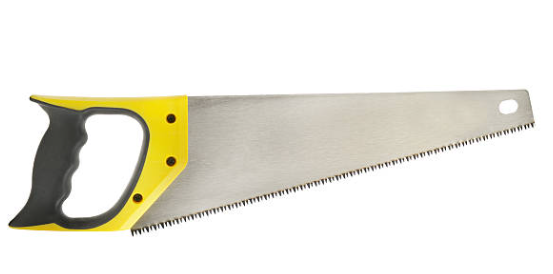
- Handsaw (crosscut saw) – the primary cutting tool for timbering members. A sharp handsaw produces square, clean ends.
- Rip saw – used for cutting timber along the grain when reducing width.
- Bow saw – suitable for curved cuts and trimming.
- Chisel – used for cutting joints, notches, and housings in timber members.
- Mallet – drives chisels and wooden pegs without damaging them.
- Axe – used for rough shaping and pointing poling boards.
- Adze – shapes and smooths timber surfaces, particularly for curved work.
Boring and Driving Tools
Some timbering operations require holes or driven members. Therefore, boring and driving tools form an important part of the kit.
- Brace and bit – bores holes for bolts, pegs, and fixings.
- Auger – bores larger diameter holes in heavy timber.
- Claw hammer – drives nails and extracts them.
- Sledgehammer – drives stakes, pegs, and poling boards into the ground.
- Maul – a heavy wooden mallet used to drive poling boards without splitting them.
Holding and Assembling Tools
- Timbering members must be held firmly during assembly. Consequently, holding tools are essential for safety and accuracy.
- Bench vice – holds timber securely during cutting and shaping.
- Clamps (G-clamps and sash clamps) – hold members together during assembly and tightening.
- Pincers – extract nails from timber.
- Wrecking bar (crowbar) – levers timber members apart during dismantling.
- Spanner and wrench set – tightens bolts and proprietary connectors.
Excavation Tools
Before timbering begins, the trench must be excavated. Therefore, excavation tools are part of the broader timbering toolkit.
- Pickaxe – breaks up hard ground and compacted soil.
- Mattock – combines digging and cutting action for stiff soils.
- Spade and shovel – remove loose soil from the trench.
- Hoe – clears and levels the trench bottom.
- Wheelbarrow – transports excavated material away from the trench edge.
Lifting and Support Equipment
Heavy timber members require mechanical assistance. Moreover, safe lifting prevents injury and material damage.
- Rope and pulley – lifts timber into and out of deep trenches.
- Chain block (hoist) – raises heavy timber sections safely.
- Timber trestles – support timber during cutting and assembly.
- Sawhorse – holds timber at working height for sawing.
Safety and Personal Protective Equipment
Safety equipment is not optional in timbering works. In fact, the TVET CDACC assessment awards marks for donning PPE before starting work.
- Overall – protects clothing and skin from dirt and splinters.
- Safety boots – protect feet from falling timber and sharp objects.
- Helmet (hard hat) – protects the head from falling objects and bumps.
- Gloves – protect hands from splinters, cuts, and abrasion.
- Safety goggles – protect eyes from flying chips during cutting.
- High-visibility vest – ensures the technician is visible on site.
- Ear protection – reduces noise exposure during hammering and cutting.
- Warning tape and lights – demarcate the excavation and warn others of the hazard.
Setting Out and Levelling Equipment
Accurate setting out ensures the trench is dug in the right place and to the right dimensions.
- Builder’s square – sets out right angles on the ground.
- Measuring rods – transfer levels and dimensions accurately.
- Dumpy level and staff – establish and check levels over distance.
- String line – guides excavation and timbering alignment.
Tools and Equipment for Specific Timbering Tasks
Different timbering tasks call for different tools. The table below summarises the correct tool for each activity.
| Task | Essential Tools |
| Measuring trench dimensions | Tape measure, folding rule, line and pins |
| Marking timber for cutting | Try square, marking gauge, pencil |
| Cutting timber to size | Handsaw, bow saw, chisel, mallet |
| Boring holes | Brace and bit, auger |
| Driving poling boards | Sledgehammer, maul |
| Checking plumbness | Plumb bob, spirit level |
| Checking squareness | Try square, builder’s square |
| Assembling members | Clamps, spanner set, hammer |
| Lifting timber | Rope and pulley, chain block |
| Excavating trench | Pickaxe, mattock, spade, shovel |
| Dismantling timbering | Wrecking bar, pincers, hammer |
| Personal safety | Overall, boots, helmet, gloves, goggles |
How to Use Timbering Tools Correctly
Correct use of tools ensures accuracy, safety, and quality workmanship. The following procedures apply to the most commonly assessed tools.
Using the Tape Measure
First, extend the tape along the member or trench and hook the end firmly. Next, read the measurement at eye level to avoid parallax error. Finally, mark the dimension clearly with a pencil. Always retract the tape slowly to avoid injury.
 tape measure
Using the Handsaw
First, mark the cutting line with a try square. Next, secure the timber on a trestle or vice. Then, start the cut with a few backward strokes to establish a kerf. Finally, saw steadily along the line, allowing the saw to do the work. Never force the saw, as this causes binding and inaccurate cuts.
Using the Try Square
First, place the stock of the square firmly against the reference edge. Next, slide the blade until it touches the mark. Then, scribe a fine line along the blade. Finally, check the line before cutting.
Using the Plumb Bob
First, suspend the plumb bob from a string attached to a high point on the member. Next, allow it to settle without swinging. Then, compare the string line with the member face. Finally, adjust the member until the string is parallel to the face.
Using the Spirit Level
First, place the level on the member to be checked. Next, observe the bubble position. Then, adjust the member until the bubble sits centrally between the lines. Finally, re-check after tightening to confirm the member has not moved.
Maintenance and Storage of Timbering Tools
Tools last longer and perform better when maintained properly. Moreover, well-maintained tools are safer to use.
- Clean tools after use – remove soil, sap, and moisture with a dry cloth.
- Sharpen cutting tools regularly – a sharp saw or chisel cuts faster and safer.
- Oil metal parts – prevent rust on saw blades, chisels, and spanners.
- Store tools in a dry place – damp storage causes rust and timber rot.
- Hang or rack tools – prevents damage and keeps the store tidy.
- Inspect before use – replace cracked handles, blunt blades, and damaged tapes.
- Account for tools – keep an inventory and check tools in and out.
Safety Precautions When Using Timbering Tools
Safety must guide every operation. Therefore, the following precautions apply at all times.
First, wear the correct PPE for the task. Second, keep tools sharp and in good condition. Third, never use a damaged tool. Fourth, cut timber away from your body and on a firm support. Fifth, keep the work area tidy to prevent trips and falls. Sixth, store tools safely after use. Finally, report any defective tool to the supervisor immediately.
In addition, avoid taking heavy machines near the excavation. Use warning tapes or lights during excavation exercises. These precautions protect both the technician and others on site.
Common Mistakes to Avoid
Many timbering failures begin with poor tool practice. Therefore, avoid the following common mistakes.
- Using a blunt saw, which causes inaccurate cuts and accidents.
- Measuring with a damaged or stretched tape.
- Cutting without marking or squaring the timber.
- Forcing a chisel with a hammer instead of a mallet.
- Leaving tools on the trench edge where they can fall.
- Storing wet tools, which causes rust.
- Ignoring PPE because the task seems minor.
- Using a spirit level that is out of adjustment.
Tools and Equipment Checklist for Timbering Works
Before starting any timbering task, confirm that the following items are available and serviceable.
- Tape measure (5 m or 8 m)
- Folding rule
- Try square and builder’s square
- Marking gauge and pencil
- Handsaw and bow saw
- Chisel and mallet
- Brace and bit or auger
- Claw hammer and sledgehammer
- Clamps and spanners
- Plumb bob and spirit level
- Line and pins
- Pickaxe, mattock, spade, shovel
- Wheelbarrow
- Rope and pulley or chain block
- Trestles and sawhorse
- Wrecking bar and pincers
- PPE: overall, boots, helmet, gloves, goggles, vest
- Warning tape and lights
Conclusion
Timbering tools and equipment are the foundation of safe and accurate temporary works. Every building technician must therefore master their selection, use, maintenance, and storage. Moreover, correct tool handling directly affects the quality of trench timbering and the safety of the entire site.
When technicians use the right tool for each task, timbering works proceed efficiently and to specification. On the other hand, neglect of tools leads to poor workmanship, wasted materials, and preventable accidents. Consequently, tool competence should be treated as a core professional skill, not a minor detail.
Frequently Asked Questions
What tools are needed for timbering works?
The core tools are a tape measure, handsaw, try square, plumb bob, spirit level, hammer, chisel, mallet, clamps, and excavation tools such as a pickaxe and spade. PPE is also mandatory.
Why is a plumb bob important in timbering?
A plumb bob establishes a true vertical line. Therefore, it is essential for checking the plumbness of poling boards, struts, and standards.
How should timbering tools be stored?
Tools should be cleaned, dried, oiled where necessary, and stored in a dry, organised rack or store. This prevents rust, damage, and loss.
What PPE is required for timbering works?
An overall, safety boots, and helmet are the minimum. Gloves, goggles, and a high-visibility vest are also recommended.
How often should cutting tools be sharpened?
Cutting tools should be sharpened whenever they become dull. A blunt saw or chisel slows work and increases accident risk.