
Element 2.1 – Clear and secure the construction site according to the contract document
INTRODUCTION
Before any building begins, you must first clear secure construction site sanitation facilities properly. Many contractors rush to excavation. This is a mistake. A site that is not cleared and secured creates safety hazards, security risks, and contract violations.
Site clearance removes vegetation, topsoil, debris, and existing structures. Site security prevents unauthorized access, theft, and injury. Signage warns workers and the public. Together, these activities protect your team, your equipment, and your client.
This blog post covers Element 2.1 of onsite sanitation training. You will learn how to clear secure construction site sanitation according to contract documents. By the end, you will know exactly what to do before digging the first hole.
Before site clearance, you must first learn to Prepare Project Management Timelines Sanitation
PART ONE: WHY YOU MUST CLEAR SECURE CONSTRUCTION SITE SANITATION
Many contractors skip proper site preparation. They start digging immediately. This approach creates serious problems.
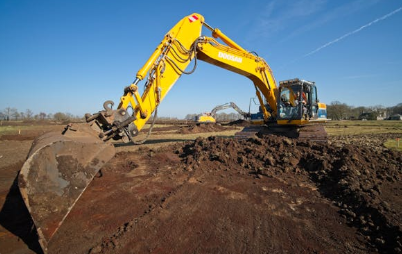
First, hidden vegetation and debris interfere with excavation. Roots block trenches. Buried concrete damages excavator buckets.
Second, an unsecured site invites theft. Tools disappear overnight. Materials walk away. Copper pipe is especially attractive to thieves.
Third, an unsecured site creates liability. A child falls into an open trench. A pedestrian walks into a dangerous area. The contractor pays compensation.
Therefore, learning to clear secure construction site sanitation is not optional. It is a legal and professional requirement.
For site safety regulations, refer to OSHA Construction Standards.
PART TWO: SITE CLEARANCE
Before you can clear secure construction site sanitation, you must understand what clearance involves.
2.1 What is Site Clearance?
Site clearance is the removal of anything that is not required for construction. This includes vegetation, topsoil, debris, and existing structures.
2.2 Vegetation Removal
First, remove all bushes, grass, and small trees from the construction area. Use a brush cutter, excavator, or manual labor. Do not burn vegetation on site unless the contract allows it.
Why this matters: Hidden roots can extend meters below ground. They will rot and leave voids under your tank. This causes settlement and cracks.
2.3 Topsoil Stripping
Second, strip the topsoil layer to a depth of 150–300 mm. Topsoil is rich in organic matter. Organic matter decomposes and shrinks. This causes uneven settlement.
How to do it: Use a bulldozer or excavator with a blade. Stockpile the topsoil separately. You will use it later for landscaping.
2.4 Debris Removal
Third, remove all construction debris, rubbish, and foreign materials. This includes old concrete, bricks, metal scrap, and plastic waste.
Why this matters: Debris buried under your tank creates weak spots. The tank may crack or tilt.
2.5 Existing Structure Demolition
Fourth, demolish any existing structures that interfere with the new facility. This may include old latrines, broken septic tanks, or abandoned foundations.
Contract requirement: Always check the contract document before demolition. Some structures require approval before removal. Others must be documented with photographs.
PART THREE: SITE SECURITY
After clearance, the next step to clear secure construction site sanitation is security. A cleared site is an open site. An open site invites trouble.
3.1 Perimeter Hoarding or Fencing
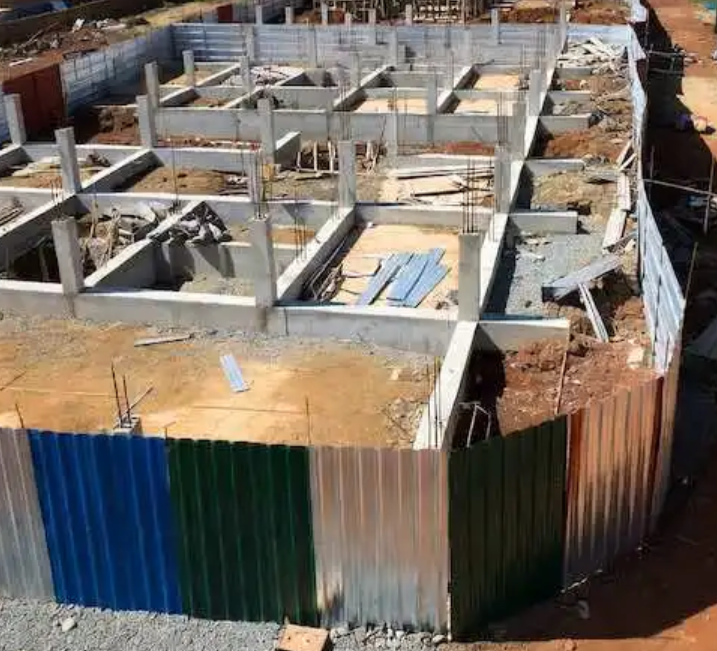
First, erect a physical barrier around the entire construction area. The barrier must be strong, continuous, and at least 1.8 meters high.
Options include:
- Corrugated iron sheets on timber frames (most common)
- Chain-link fence on steel posts
- Prefabricated security panels
Contract requirement: Many contracts specify the type of hoarding. Read the document carefully. Some require branded hoarding with the client’s logo.
3.2 Lockable Gates
Second, install lockable gates at all access points. Each gate must have a sturdy lock. The contractor keeps the keys.
Why this matters: A fence with an open gate is useless. Lock gates every evening. Unlock them only during working hours.
3.3 Security Guards
Third, provide a security guard if the contract requires it. Guards are common for:
- Large sites (over 500 square metres)
- Sites in high-crime areas
- Sites with expensive equipment or materials
- Sites where theft has occurred before
Cost consideration: A security guard costs money. However, one night of tool theft costs more. Do the math.
3.4 Tool and Material Storage
Fourth, secure tools and materials within the site. Use lockable containers or tool sheds. Do not leave equipment in the open overnight.
Best practice: Take photographs of all equipment at the end of each day. This helps with insurance claims if theft occurs.
For security best practices, refer to Construction Industry Institute guidelines.
PART FOUR: SAFETY SIGNAGE
Signage is part of how you clear secure construction site sanitation. Signs warn people. Signs protect you legally.
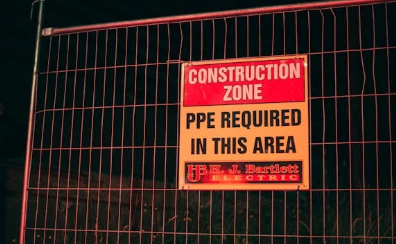
4.1 Mandatory Safety Signs
Install these signs at every entrance and around the perimeter:
| Sign Text | Purpose |
| “DANGER – CONSTRUCTION SITE” | General warning |
| “HARD HAT AREA” | Head protection required |
| “NO UNAUTHORISED ACCESS” | Legal notice |
| “KEEP OUT – CHILDREN” | Specific warning for public |
| “DEEP EXCAVATION” | Hazard-specific warning |
4.2 Additional Signs for Sanitation Sites
Sanitation sites have unique hazards. Add these signs:
- “RAW SEWAGE – HEALTH HAZARD”
- “CONFINED SPACE – ENTRY BY PERMIT ONLY”
- “GAS HAZARD – VENTILATION REQUIRED”
4.3 Sign Placement Rules
Place signs at eye level (1.5 meters above ground). Use weatherproof materials. Replace faded or damaged signs immediately.
Legal note: In Kenya, the Occupational Safety and Health Act (OSHA) requires warning signs at all construction sites. Failure to display signs can result in fines.
PART FIVE: CONTRACT DOCUMENT REQUIREMENTS
Every contract document specifies site handover requirements. You must read these before you clear the secure construction site sanitation.
5.1 What the Contract May Require
| Requirement | Description |
| Site survey | Pre-clearance survey with photographs |
| Environmental protection | Measures to prevent erosion or runoff |
| Tree preservation | Some trees must remain protected |
| Archaeological finds | Procedure if artifacts are discovered |
| Neighbour notifications | Written notice to adjacent property owners |
| Utility location | Marking of underground cables and pipes |
5.2 Site Handover Procedure
Site handover is the formal transfer of the site from client to contractor. The procedure typically includes:
Step 1: Both parties walk the site together.
Step 2: The client points out boundaries, existing utilities, and protected areas.
Step 3: The contractor notes any existing damage or hazards.
Step 4: Both parties sign a site handover certificate.
Step 5: The contractor takes possession.
5.3 Site Handover Certificate
A site handover certificate must include the following:
- Date and time of handover
- Names and signatures of both parties
- Site description and boundaries
- Condition of the site (photographs attached)
- Any special conditions
Why this matters: Without a signed certificate, disputes arise. The client may claim you damaged something that was already broken. The certificate protects you.
PART SIX: SITE CLEARANCE AND SECURITY CHECKLIST
Use this checklist when you clear secure construction site sanitation:
Clearance Checklist
- Vegetation removed from construction area
- Topsoil stripped (150–300 mm depth)
- Debris removed and disposed properly
- Existing structures demolished (if required)
- Topsoil stockpiled separately for reuse
Security Checklist
- Perimeter hoarding or fence erected (min. 1.8 m)
- Lockable gates installed
- Security guard arranged (if contract requires)
- Tool storage container on site
- Night lighting installed (if required)
Signage Checklist
- Danger – Construction Site sign at entrance
- Hard Hat Area signs posted
- No unauthorized access signs posted
- Child warning signs posted
- Sewage hazard signs posted (if applicable)
Contract Checklist
- Pre-clearance photographs taken
- Site handover certificate signed
- Utility locations marked
- Environmental measures in place
- Neighbour notifications sent (if required)
After site clearance, learn to prepare method statements for excavation.
PART SEVEN: LEARNING OUTCOME CHECK
After learning to clear and secure construction site sanitation, you should be able to:
| # | Learning Outcome |
| I | Remove vegetation, topsoil, debris, and existing structures correctly |
| II | Strip topsoil to the required depth (150–300 mm) |
| III | Erect perimeter hoarding or fencing with lockable gates |
| IV | Arrange security guards when contract requires it. |
| V | Install all mandatory safety signs at correct locations |
| VI | Follow contract requirements for site handover |
| VII | Complete and sign a site handover certificate |
CONCLUSION
Learning to clear secure construction site sanitation is the foundation of every successful project. Without proper clearance, you build on unstable ground. Without proper security, you invite theft and liability. Without proper signage, you risk injury and fines.
The contractor who skips site preparation is the contractor who fails. The professional who follows this checklist builds safely, securely, and legally.
Therefore, clear the site. Secure the site. Sign the certificate. Then dig.
Ready for the next step? Read Element 2.2: Excavation and Timbering.