
How to erect a scaffold safely is a core skill that every building technician must master before working at height. This guide explains the methods and best practices for safe scaffold erection, helping technicians build stable, compliant structures step by step.
Introduction: Why Safe Scaffold Erection Matters
Scaffold erection exposes workers to serious hazards. Moreover, falls from height remain one of the leading causes of construction fatalities worldwide. Consequently, a scaffold that is erected incorrectly endangers everyone who uses it.
In addition, scaffold failure damages materials, delays work, and attracts legal penalties. Therefore, technicians must follow approved methods and best practices at every stage.
This guide therefore covers the full erection process, from planning and ground preparation to final inspection and handover.
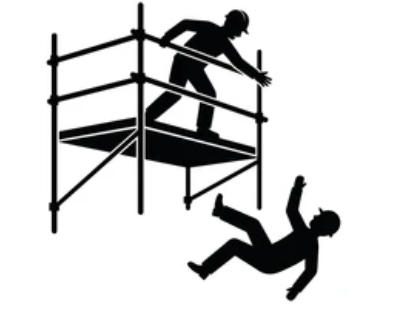
falls from height
Planning Before Erection
Safe erection begins long before the first standard is lifted. In fact, planning prevents most problems that arise on site.
Step 1: Study the Scaffold Design
First, obtain and study the scaffold design or drawing. Identify the scaffold type, bay sizes, lift heights, and tie positions. Moreover, confirm the duty rating required for the work.
If no design exists for a standard configuration, follow the manufacturer’s instructions. However, scaffolds above 10 metres, or those with special loads, require design by a professional engineer.
Step 2: Assess the Site and Ground Conditions
Next, inspect the ground where the scaffold will stand. Confirm that it is firm, level, and capable of carrying the scaffold and its loads.
Furthermore, check for:
- Soft spots, backfilled trenches, or drains.
- Sloping ground that needs levelling.
- Overhead power lines within safe distance.
- Underground services that could be damaged.
- Public access routes that need protection.
Step 3: Identify Hazards and Control Measures
Then, carry out a risk assessment. Identify hazards such as falls, falling objects, electrical contact, and vehicle impact. Moreover, plan control measures for each hazard.
For instance, provide guard rails, netting, warning signs, and exclusion zones. In addition, plan for adverse weather, especially high winds.
Step 4: Select Competent Personnel
Scaffold erection must be carried out by competent people under competent supervision. Therefore, confirm that erectors hold the required training and certification.
In addition, brief the team on the design, sequence, and hazards before work begins.
Step 5: Prepare Tools, Materials, and PPE
Next, gather all tools, components, and PPE. Inspect each item and reject anything damaged. Moreover, confirm that all components come from a compatible system.
Provide PPE including helmets, safety boots, gloves, goggles, high-visibility vests, and fall protection harnesses.
Preparing the Ground and Foundation
A scaffold stands only as firmly as its foundation. Therefore, ground preparation is critical.
Step 6: Level and Compact the Ground
First, clear the area of debris and vegetation. Then, level and compact the ground where standards will stand.
On sloping ground, cut steps or use adjustable base plates. Consequently, each standard bears evenly on the ground.
Step 7: Install Sole Boards and Base Plates
Next, place sole boards under every standard. Sole boards spread the load over a wider area. Then, place base plates on top of the sole boards.
Moreover, ensure that sole boards sit flat and do not bridge soft spots. As a result, the scaffold avoids differential settlement.
Step 8: Set Out the Scaffold
Then, set out the scaffold outline using a tape measure, line, and builder’s square. Mark the positions of all standards.
Check the diagonals to confirm squareness. Consequently, the scaffold sits true and the bays remain uniform.
Methods of Scaffold Erection
Different scaffold types use different erection methods. Therefore, technicians must follow the method suited to the system.
Method 1: Frame Scaffold Erection
Frame scaffolds are the fastest to erect. Therefore, follow this sequence:
- Place base plates and frames on the sole boards.
- Connect frames with cross-bracing.
- Install the first lift of ledgers and transoms.
- Lay the platform boards.
- Install guard rails and toe boards.
- Repeat for each lift, adding ties as required.
Method 2: Tube and Clamp Scaffold Erection
Tube and clamp scaffolds are more flexible but slower. Therefore, follow this sequence:
- Erect the first pair of standards and brace them.
- Fix ledgers at the specified lift heights.
- Add transoms to support the platform.
- Install diagonal braces on each face.
- Repeat for each lift, plumbing and levelling as you go.
Method 3: System Scaffold Erection
System scaffolds use locking devices. Therefore, follow the manufacturer’s sequence exactly. Moreover, never mix components from different systems.
Method 4: Mobile Tower Erection
Mobile towers must follow the manufacturer’s instructions. Therefore:
- Assemble the tower horizontally where possible.
- Fit the castors and lock them.
- Raise the tower into position.
- Install outriggers or stabilisers before climbing.
- Never exceed the safe height-to-base ratio.
Step-by-Step Erection Sequence
Regardless of system, most scaffolds follow a similar sequence. Therefore, use the following steps as a general guide.
Step 9: Erect the First Lift
First, position the base plates and standards. Then, fix the ledgers and transoms for the first lift. Check plumbness and level as you go.
Step 10: Install Bracing
Next, install diagonal braces on each face. Bracing prevents the scaffold from racking. Moreover, fix braces to the standards with couplers at the correct torque.
Step 11: Install Ties to the Structure
Then, tie the scaffold to the building at the specified intervals. Ties prevent the scaffold from moving away from or into the structure.
Consequently, never remove ties without approval. In addition, replace them immediately if disturbed.
Step 12: Lay the Working Platform
Now lay the platform boards across the transoms. Butt boards closely with no gaps. Moreover, secure every board against movement.
Step 13: Install Guard Rails and Toe Boards
Next, install guard rails at the specified heights. Fit toe boards along every platform edge. As a result, workers and materials stay protected.
Step 14: Provide Safe Access
Then, install ladders or stair towers for access. Secure ladders at the top and bottom. Moreover, never allow workers to climb cross-bracing.
Step 15: Repeat for Each Lift
Repeat the sequence for each lift. Consequently, ties, braces, and platforms follow the scaffold upward.
Step 16: Inspect Before Use
Finally, inspect the completed scaffold before handing it over. Check plumbness, level, ties, braces, guard rails, and platform boards. Then, record the inspection and attach a tag.
Best Practices for Safe Scaffold Erection
Best practices keep the work safe and efficient. Therefore, apply the following throughout the project.
- Work from a safe position – erect from the ground or a completed lift, never from an unguarded edge.
- Erect progressively – never leave the scaffold in an unstable state overnight.
- Tie as you go – install ties with each lift, not at the end.
- Brace immediately – fix braces as soon as standards and ledgers are in place.
- Keep platforms clear – remove tools and debris to prevent trips and falls.
- Control the load – never exceed the duty rating of the scaffold.
- Watch the weather – stop erection in high winds or heavy rain.
- Protect the public – use exclusion zones, netting, and signs.
- Communicate – use clear signals when lifting components.
- Inspect daily – check the scaffold before each shift and after any event.
Common Hazards During Erection
Erection work involves several hazards. Therefore, technicians must recognise and control them.
- Falls from height – use fall protection and complete platforms.
- Falling objects – use toe boards, netting, and exclusion zones.
- Electrocution – keep clear of overhead power lines.
- Instability – brace and tie the scaffold as it rises.
- Overloading – stack materials evenly and within limits.
- Manual handling – use lifting aids and team lifts.
- Adverse weather – stop work in high winds, lightning, or heavy rain.
Common Mistakes to Avoid
Many scaffold failures result from avoidable errors. Therefore, avoid the following common mistakes.
- Erecting on soft or uneven ground without sole boards.
- Omitting ties to the structure.
- Skipping diagonal braces.
- Leaving gaps in platform boards.
- Failing to install guard rails and toe boards.
- Exceeding the safe height of a mobile tower.
- Mixing components from different systems.
- Removing ties or braces without approval.
- Ignoring inspection after alterations.
- Allowing untrained workers to erect scaffolds.
Inspection and Handover
Inspection confirms that the scaffold is safe for use. Therefore, follow these requirements.
Scaffolds from which a person might fall 2 metres or more must be inspected on completion and at least weekly thereafter. Inspection is also required after bad weather and after any modification.
During inspection, check:
- Plumbness and level of standards.
- Tightness of couplers.
- Presence and tightness of ties.
- Completeness of bracing.
- Condition of platform boards.
- Presence of guard rails and toe boards.
- Safe access and egress.
- Condition of the ground and base.
Record the results in the scaffold register and attach an inspection tag. Consequently, users know the scaffold is safe and current.
Step-by-Step Summary Table
| Stage | Step | Key Point |
| Planning | Study design | Confirm type, bays, and ties |
| Planning | Assess ground | Firm, level, and clear |
| Planning | Assess hazards | Falls, objects, power lines |
| Planning | Select personnel | Trained and competent |
| Planning | Prepare tools and PPE | Inspect and reject defects |
| Ground | Level and compact | Even bearing for standards |
| Ground | Install sole boards | Spread the load |
| Ground | Set out scaffold | Check squareness |
| Erection | Erect first lift | Plumb and level as you go |
| Erection | Install bracing | Brace every face |
| Erection | Install ties | Tie as you go |
| Erection | Lay platform | Butt boards closely |
| Erection | Install guard rails | Protect every edge |
| Erection | Provide access | Ladders or stair towers |
| Erection | Repeat lifts | Follow the sequence upward |
| Handover | Inspect | Record and tag |
Conclusion
Safe scaffold erection depends on planning, preparation, and disciplined execution. When technicians study the design, prepare the ground, and follow the correct sequence, they build scaffolds that protect workers and support efficient construction.
Moreover, best practices such as tying as you go, bracing immediately, and inspecting regularly prevent the failures that cause injuries. Therefore, never rush erection, and never cut corners. As a result, work at height proceeds safely, and every worker returns home unharmed.
Frequently Asked Questions
What is the first step in erecting a scaffold?
The first step is to study the scaffold design and assess the site. Planning prevents most problems that arise during erection.
How often must a scaffold be inspected?
Scaffolds from which a person might fall 2 metres or more must be inspected on completion and at least weekly thereafter. Inspection is also required after bad weather and modifications.
Why must scaffolds be tied to the structure?
Ties prevent the scaffold from moving away from or into the structure. Therefore, install ties as the scaffold rises, not at the end.
What is the safe height for a mobile tower?
The safe height depends on the manufacturer’s instructions and the base dimensions. Therefore, never exceed the height-to-base ratio specified, and always fit outriggers when required.
Can untrained workers erect scaffolds?
No. Scaffold erection must be carried out by competent people under competent supervision. Therefore, only trained and certified erectors should perform the work.